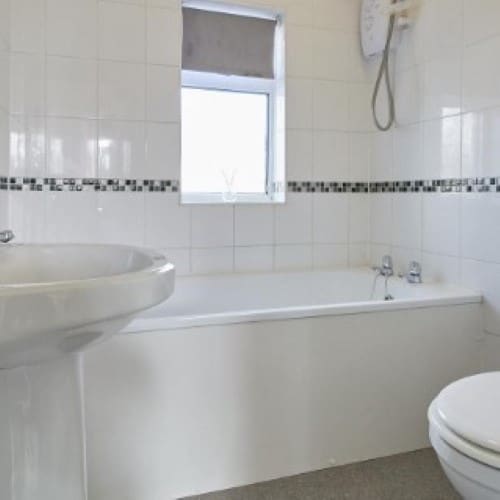
Toilet and bathroom leaks can lead to various issues and consequences beyond the immediate visible signs of water.
Toilet leaks are usually indicating a problem with the toilet’s plumbing or the waterproofing membrane worn off. Toilet leaks are typically due to failure of the water tightness. Toilets can leak from the tank, and cracks in the bowl, the water supply line, or the base.
Results of bathroom leaks
- Water damage
Water leaks can cause damage to walls, ceilings, floors, and other structural components of the bathroom. Over time, water can seep into the building material, leading to rot, mould growth, and structural weakening. Water damage can be expensive to repair and may require the assistance of professionals.
- Mould and Mildew growth
Excess moisture from leaks creates an ideal environment for mould and mildew to thrive. Mould growth can cause health issues, such as allergies and respiratory problems. It can also lead to further damage to surfaces and materials in the bathroom. Promptly addressing leaks helps prevent mould and mildew issues.
- Water bill increased
Undetected leaks can result in a significant increase in water bills. Even small leaks, such as dripping faucets or running toilets, can waste a considerable amount of water over time. Monitoring your water usage and addressing leaks promptly can help save water and reduce utility costs.
- Structural integrity issues
Prolonged water exposure can compromise the structural integrity of your bathroom. This is especially true for wooden structures, such as subfloors and wall studs, which can rot and weaken. If not addressed, it may lead to costly repairs or even safety hazards.
- Electrical hazards
If water leaks reach electrical components in the bathroom, such as outlets, light fixtures, or wiring, they can pose electrical hazards. Water and electricity are a dangerous combination, and any signs of water near electrical outlets or appliances should be taken seriously. Turn off the power to the affected area and consult an electrician.
- Slip and fall hazards:
Accumulated water from leaks can create slippery surfaces, increasing the risk of slip-and-fall accidents in the bathroom. This is particularly dangerous for elderly individuals or those with mobility issues. It’s crucial to clean up any water and address leaks promptly to maintain a safe bathroom environment.
- Indoor air quality
Mould growth and stagnant water from leaks can negatively impact the indoor air quality in your home. The presence of mould spores and dampness can lead to musty odours and respiratory irritations. Addressing leaks and ensuring proper ventilation can help maintain better air quality.
In addition to the above damages, let us go through and find out the possible ways and areas of the bathroom where leaks can occur.
Ways to determine toilet leaks
- Water supply pipes leaks
Observe and trace if there are any continuous or intermittent sounds of water running or dripping in the toilet. Check all faucets including handles and spouts. Examine showerheads, bathtub spouts, and other fixtures for signs of water leakage. Hand-touch the pipes and connection to find out if there is any water dripping, wetness, or corrosion.Carry out a water meter test by turning off all faucets and water sources in the house. Check if there are any changes in the current meter reading for the next few hours. If the reading has a charge, it indicates that there might be a hidden leak in the pipes
- Toilet seals and caulking
Trace the seals and caulking around sinks, bathtubs, and showers. Worn-out, cracked, or deteriorated caulking can allow water to seep through the walls or floors. The seals around the base of the toilet, bathtub, and shower could have damage or gaps to lose their water tightness.
- Tile grouts
Damaged or cracked grout lines between tiles can allow water to penetrate behind them, leading to leaks. Repair or re-grout for any areas where the grouting is missing, damaged, or crumbling to prevent water infiltration. Over time, wall tiles can develop hairline cracks and fractures which can lead to leaks. This can happen when the temperature difference between the hot and cold room temperatures results in tile grout expansion and contraction.
- Water Ponding areas
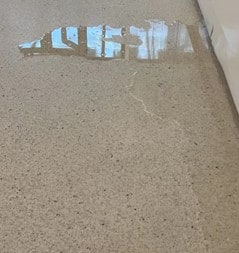
Examine the area around the base of the bathroom for any signs of water ponding or discolouration on the floor. Check the walls or adjacent surfaces, leaks can travel and cause damage in an unexpected area. Check for visible cracks or damage along the surface area.Carefully inspect your bathroom to identify where the leak is originating from. Look for visible signs of water, such as pooling water, wet spots, or discoloration on walls, floors, or ceilings. Check around fixtures, pipes, seals, and connections.
- Flooring and inter-floor leaks
The ceiling and walls could also be an indication of a water leak from above. If you notice water stains on the ceiling below your bathroom, it could be a sign of leaks or water damage. Flooring and sub-flooring can damage the flooring and cause water to seep into the subfloor and cause damage to the ceiling of the lower unit.
The solution to repairing the waterproofing in your toilet
- Identify the leak area
Inspect the area around the toilet to determine where the waterproofing has been compromised. Look for signs of water damage, discolouration, or soft spots on the walls, floor, or ceiling below the bathroom.
- Remove the damaged waterproofing
If there are any loose or damaged waterproofing materials, such as tiles, grout, or caulking, carefully remove them using appropriate tools. Be cautious not to cause further damage.
- Repair or Replace Substrate
If the underlying substrate, such as the cement board or drywall, has been damaged due to prolonged moisture exposure, it may need to be repaired or replaced. Ensure that the substrate is structurally sound before proceeding.
- Seal Joints and Gaps
Pay special attention to joints, corners, and gaps around the toilet and other fixtures. Apply a waterproof sealant or caulk to ensure a watertight seal. This will prevent water from seeping into vulnerable areas.
- Replace Tiles and Grout
If the existing tiles or grout were damaged during the removal process, replace them with new ones. Use appropriate adhesive and grout to ensure a secure and waterproof installation. Allow the new tiles and grout to cure completely before using the bathroom.
- Apply Waterproofing Membrane
Once the substrate is in good condition, apply a waterproofing membrane to the area around the toilet. There are various types of waterproofing membranes available, such as liquid membranes (Clear penetrative treatment).
Clear Penetrative Treatment will be the most effective waterproofing solution to repair such water seepage issues rather than removing or replacing the shower area. Clear Penetrative Treatment is a chemical solution that ensures water tightness of substrates, penetrating and reacting with the substrates to create a waterproofing layer within the wall or slab to stop and prevent any further water ingress. No drilling or hacking of existing flooring is required.
Once the leak is identified, it is recommended to address the issue promptly to prevent water waste and potential damage. Seek a professional and experienced contractor, SWC Construction, to accurately diagnose the issue, repair the leak and address any water damage. It is crucial to stop bathroom leaks promptly to prevent further damage, mould growth, and water wastage.
Regular Maintenance is required to maintain the waterproofing integrity of your bathroom, perform regular inspections and promptly address any signs of damage or leaks. This includes regularly checking and resealing joints, ensuring proper ventilation, and promptly repairing any plumbing issues.
If the ceiling underneath an upstairs bathroom is leaking, chances are a bathroom leak is the culprit. Ceiling leaks are often caused by concealed pipe issues and waterproofing membranes worn off from the upstairs that are neglected for a period of time.
This could be resolved with our most effective PU Injection method to rectify water leakages through concrete structures as well. Once you understand the nature of repair, you can choose the right type of material to be used.
Such grouting use polyurethane material injected into the wall, tiles, and concrete pile wall to seal the crack line, gap, and even voids in the concrete slab. The grout rapidly penetrates the structure and subsequently hardens to increase its strength, stability, and durability.
PU injection Grouting not only can solve your seepage, and water leaking problem, but it also enhanced additional sealant protection to the wall, tile, roof, and concrete for several more years. It is totally mess-free, with no hacking required, and time-saving.
This method involves pressure injection, liquid resin is injected into the vicinity of the leak area, or crack line which causes a chemical reaction to fill up the crack space. The grout will expand and form a gel, the mixture will react and expand inside the concrete structure, to stop water flowing through structural joints and crack. They are flexible and ridged, the water flow or leak can be used to pull the grout into the structure. A hole is drilled in the vicinity of the leak from the outside, creating a seal through the entire wall. PU Grout can also be injected directly into the leaking area without any necessity of the dry surface.
There is no hacking of wall tiles or flooring required with this modern technique. It also assures no re-occurrence of water leakage.
PU Grouting will not be worn out, unlike some other grouting which will be washed off with scrubbing of the wall and flooring during regular washing. Even if the cold/hot climate changes, able to avoid the expansion/contraction reaction.
SWC Construction provides on-site inspection to assist homeowners and property owners to define and repair toilet water leakage issues.
Call For a consultation now, we will resolve your leaks issue, we provide on-site consultation to solve your concerns. We have valuable feedback and comment on our services and work provided by our customers.


